In today's digital age, businesses seek improved processes for better vendor communications. Odoo integrated ERP system is a gateway to manage relations directly with its website platform. Vendor registration on the platform is crafted to make the process smooth, transparent, and hassle-free for both sides. This blog will walk you through how vendor registration works in Odoo, highlighting its key features and benefits.
Introduction to Vendor Registration in Odoo
Vendor registration in Odoo refers to the process where a vendor or supplier provides details and information on a business's website. This is the most significant aspect of companies onboarding new vendors quickly. The registered vendors can be tracked, managed, and integrated into various business processes, including procurement, invoicing, and inventory management.
Odoo user-friendly platform allows vendors to input and submit their registration details online without fearing any bugs. This kind of Odoo software enables this part of business to be done without much manual work. By processing automatically, time is saved, which would, in other words, be the case with manual data input, which would have to employ human factors for this exercise.
Benefits of Vendor Registration on the Odoo Website
Before diving into the technical steps, let's take a look at the key benefits of using Odoo for vendor registration:
- Easy Onboarding: Vendors can fasten the onboarding process by filling out their details on the online registration form.
- Data Accuracy: Odoo being flexible, the fields can be customized for collecting accurate and relevant vendor information, minimizing errors, or reducing potential data entry mistakes.
- Automation: TA new vendor registering will set an automatic alert to approve their act and save time. You can also set up workflows to assign vendor categories, approvals, and access permissions automatically.
- Transparency: Vendors have access to their profile information at all times, and businesses can track their vendor data, simplifying communications and reducing the need for constant follow-ups.
- Seamless Integration: Vendor information might be available within the procurement or accounting modules.
Step-by-Step Guide to Vendor Registration in Odoo
Vendor registration in Odoo is a crucial process that helps businesses efficiently manage and onboard new vendors. This step-by-step guide will walk you through creating a vendor in Odoo, detailing every action you need to take to ensure a smooth registration experience for your business and the vendor.
Step 1: Create a Vendor from the Vendor Registration Section
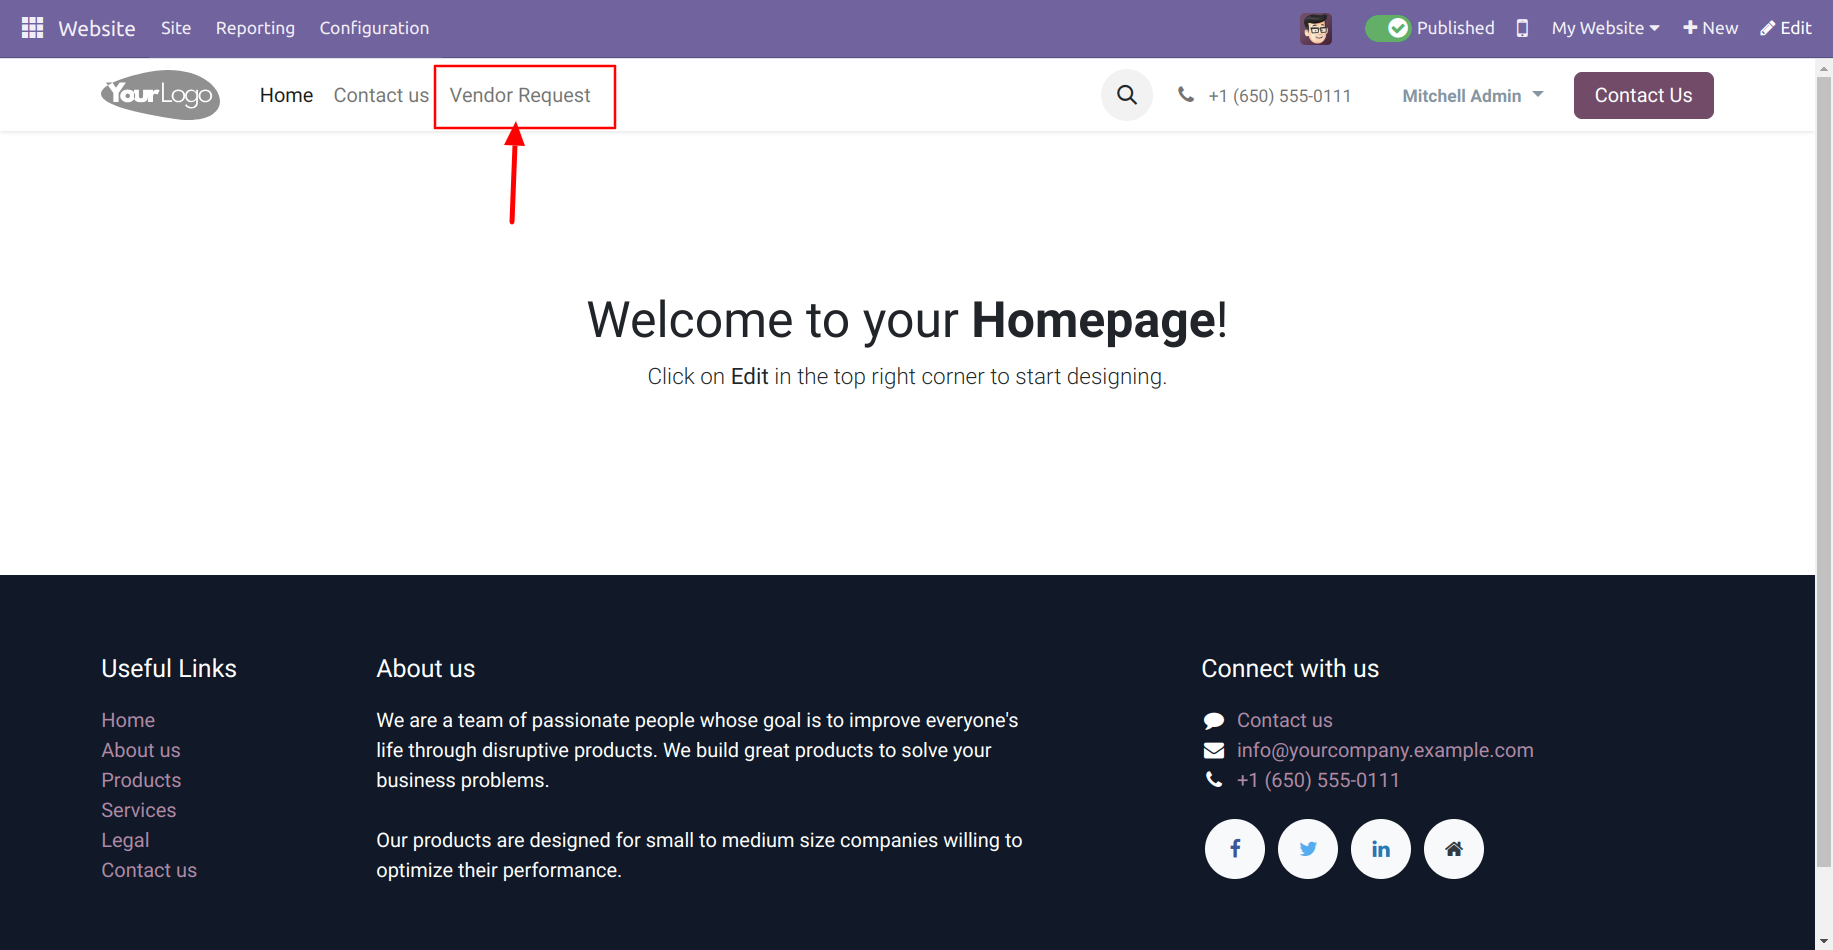
The first step is to access the vendor creation page within your Odoo system. This can usually be found within the Purchasing module or Vendors section. Here's what to do:
- Login to your Odoo account.
- Go to the Purchasing module (or any other module you have set up for vendor management).
- Select the Vendors tab to begin the registration process.
- Click the Create button to add a new vendor.
Step 2: Fill in the Vendor Details
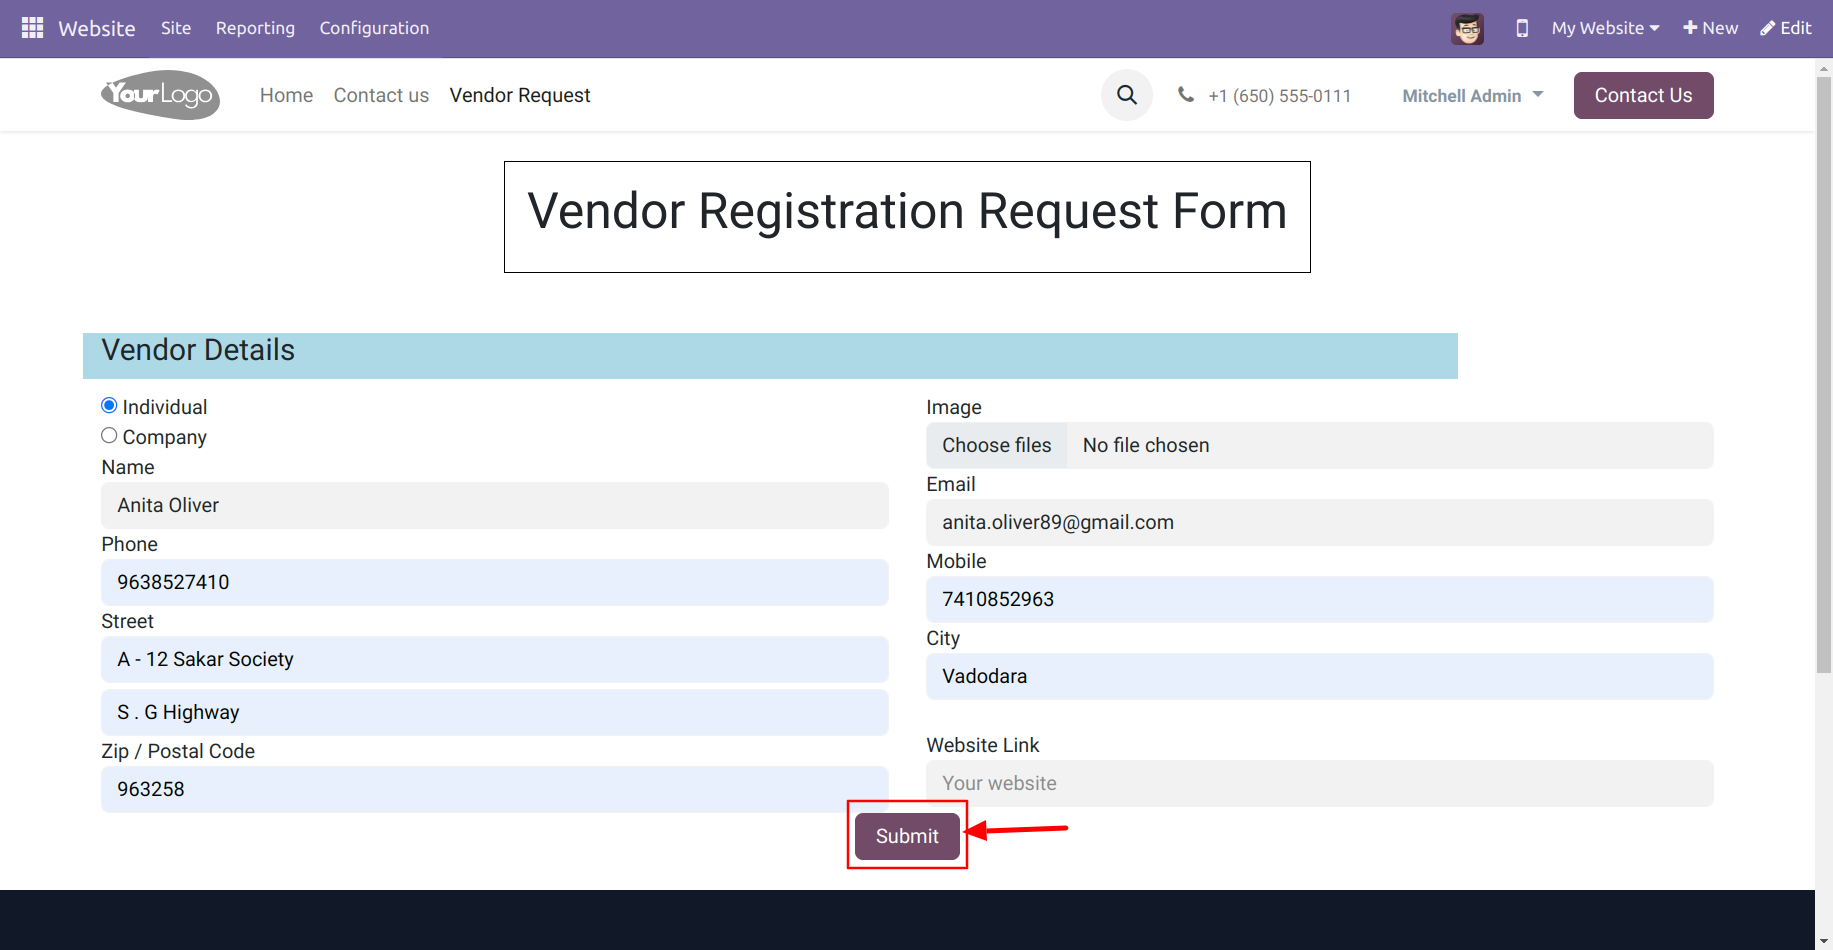
Once you are on the page for creating a new vendor, you must add all the information about the new vendor. Such fields may contain;
Vendor Name: Vendor or supplier official name.
Contact Information: Insert their phone numbers, e-mail addresses, and physical addresses.
Tax Information: Include tax IDs where they are necessary, such as VAT.
Payment Terms: Determine the current payment terms applicable to this vendor
Banking Details: Some systems allow you to input vendor bank details for seamless payment processing.
Product or Services Offered: Indicate what products or services this vendor will provide to your business.
Ensure all required fields are filled correctly before submitting the vendor information.
Step 3: Click on Submit
After filling in all the required information, double-check the details you've entered for accuracy. Once everything looks good:
Click the Submit or Save button to save the vendor to the System.
This step will create the vendor record in the System.
Step 4: Vendor Created in the System
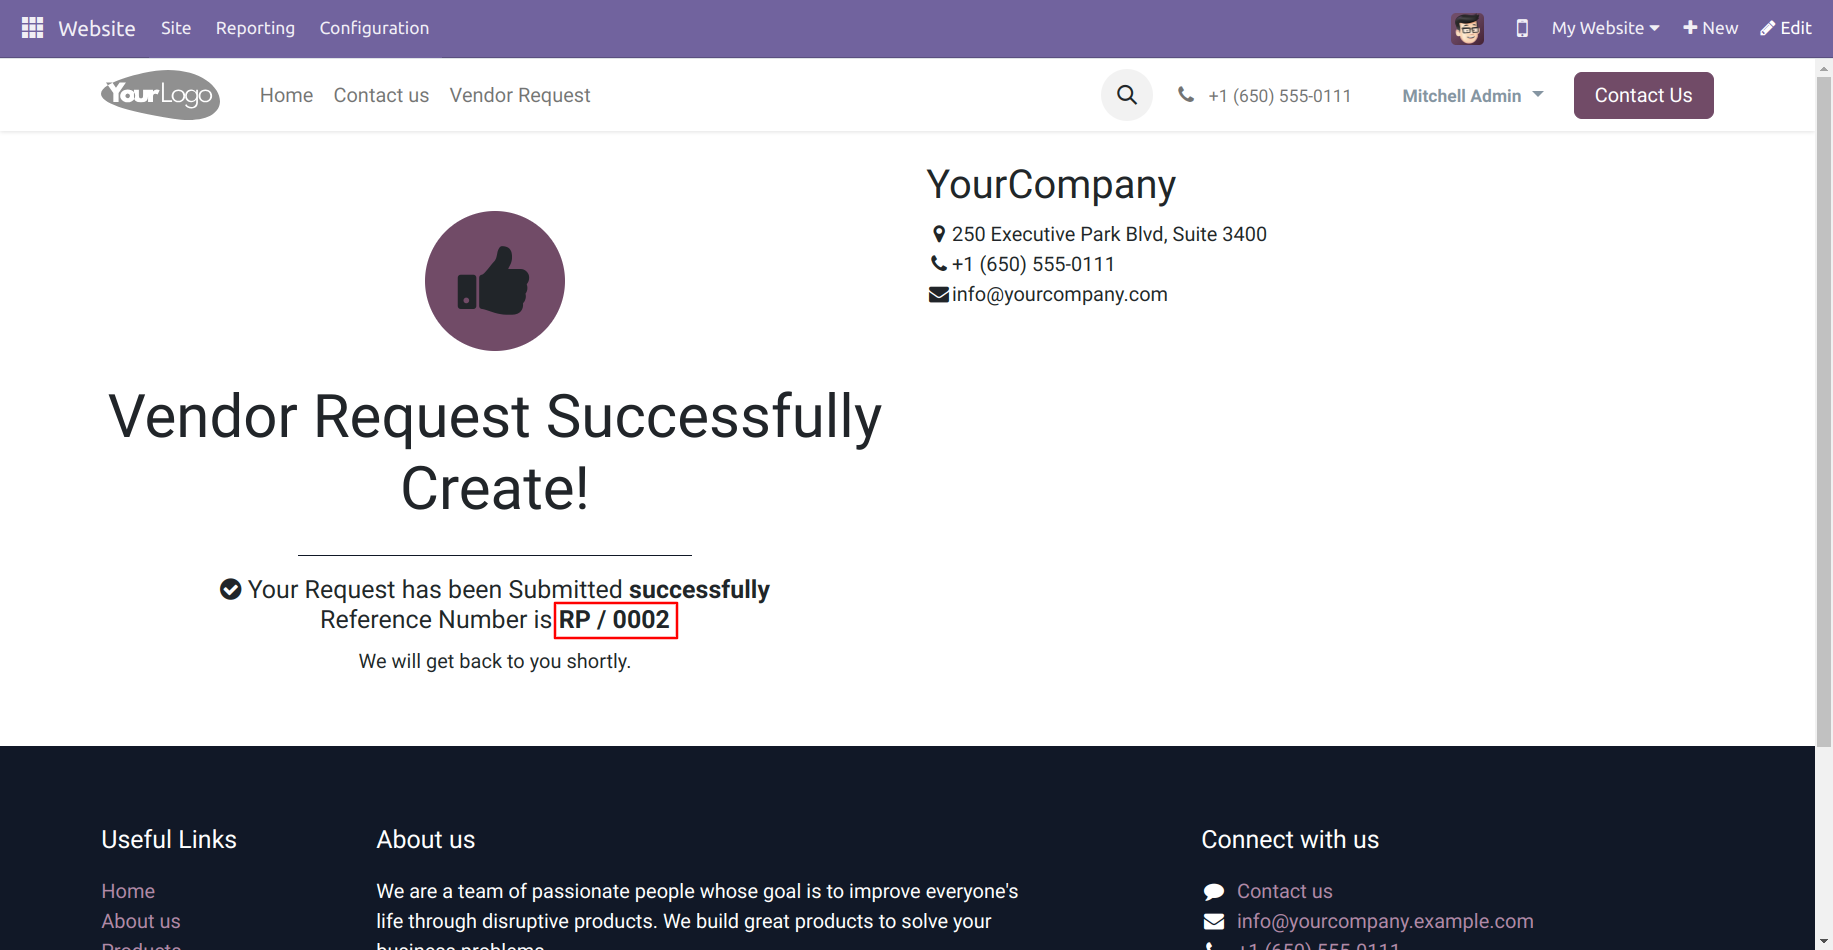
The details of the newly created vendor are saved in the Odoo system once the form is submitted. The created vendor is now a part of your vendor list and can be found within your business system. You can thus:
Monitor purchases, payments, and all communications with the vendor.
Refer to any vendor at any time.
Step 5: Vendor-created as Portal User in the System
Besides the vendor creation, the portal user is created for the same in the System. The vendor accesses their details and maintains their profile in this portal. The System generates a new user account related to the vendor for the portal user.
According to the permissions provided, the vendor can see other details, such as order history, payments, and invoices.
Step 6: A password reset link is sent to the new vendor
Once the vendor is created and the corresponding portal user has been created, it automatically sends a password reset link to the e-mail address of that vendor. This e-mail will provide the vendor with details so that they may activate their portal account. It usually includes:
A link to reset their password.
Instructions on how to access their portal for the first time.
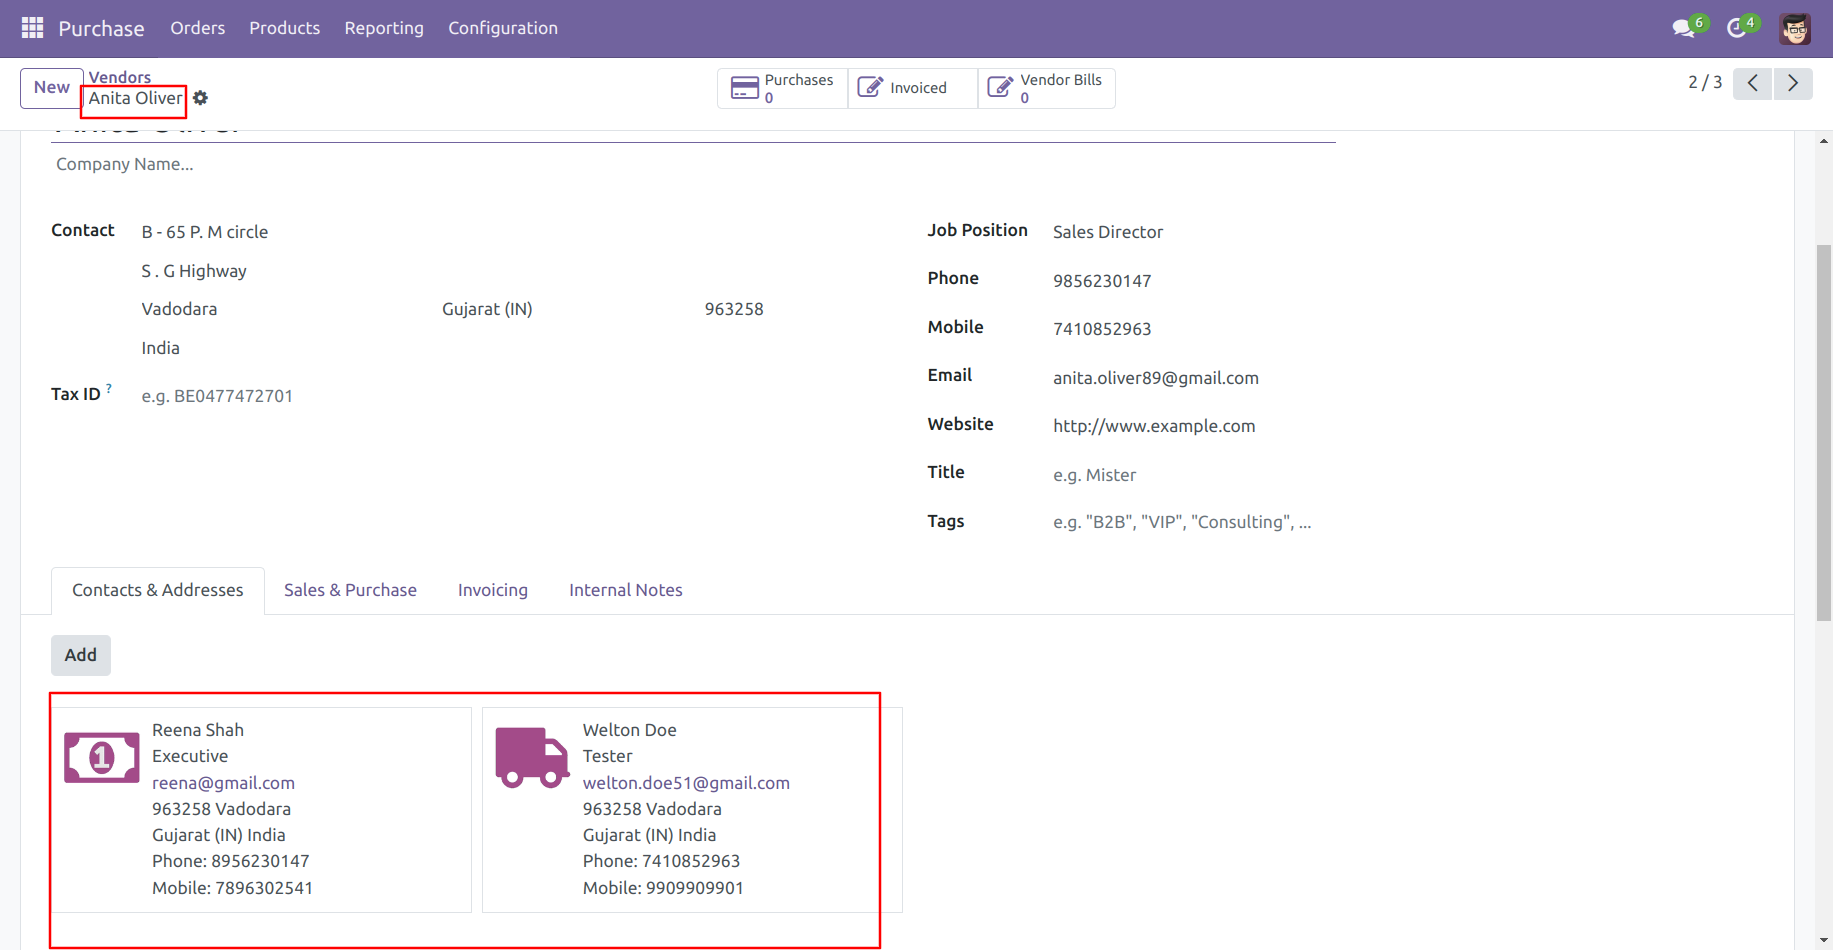
Step 7: New Vendor Creates Their Contact
After the vendor receives the password reset link, they will follow the instructions to set up their password and create a secure login for their portal. After setting the password:
The vendor will log into the Odoo portal and can manage their contact information.
The vendor can update their contacts by filling in their e-mail, telephone number, address, etc.
This will ensure that, on their part, the vendor can handle his account and make changes directly.
Step 8: Contact Created Successfully
The information is saved successfully in the System after the vendor updates their contact details on the portal. This completes the vendor registration process. The contact is now fully registered in your Odoo system and will be available for purchase orders, invoices, and other vendor-related workflows.
Integrating Vendor Registration with Other Odoo Modules
The best part about the Odoo vendor registration system is its ability to integrate with other Odoo modules. Here's how it works:
- Procurement: Once the vendor is registered, their information will automatically sync with the procurement module. Therefore, businesses can make purchase orders or control the entire process of the supply chain in less time.
- Accounting: Odoo ensures that there is always integration between vendor information and accounting. This helps the system to process invoices and payments for you, which keeps all the financial data up-to-date.
- Inventory: Vendor registration can also be linked with the inventory module, allowing businesses to manage stock levels and vendor-related products more efficiently.
- CRM: Odoo CRM module can be used in managing vendor relationships, tracking interaction, communication, and performance over time.
FAQS of Vendor Registration Works in Odoo Website
1. What is Vendor Registration in Odoo?
Vendor registration in Odoo allows suppliers or service providers to sign up and create their profiles on your company Odoo website. Vendors can manage their information, products, and services directly through the platform.
2. How do I register as a vendor on Odoo?
To register as a vendor, go to the vendor registration page on your company's Odoo website. Fill in the required details, including your business name, contact information, and product/service offerings. Once submitted, your account will be created, and you will receive a confirmation email.
3. Is there a specific approval process for vendor registration?
Yes, once a vendor submits their registration, it goes through an approval process managed by the system administrator. The admin reviews the information and either approves or rejects the vendor account based on your company's criteria.
4. Can vendors manage their profiles and products?
Yes, vendors can log into the platform and manage their business profile, update contact details, and upload product or service information once registered and approved. They can also track orders, invoices, and payment statuses directly from the vendor dashboard.
5. What happens if my registration is rejected?
If your registration is denied, the admin will notify you of the reason for rejection. You may be asked to correct details or provide additional information before reapplying.
Conclusion: Simplifying Vendor Onboarding with Odoo
In conclusion, Odoo vendor registration process is simple, and customizable. It allows businesses to quickly onboard vendors and integrate them into various business processes. With features that improve data accuracy, transparency, and automate tasks, Odoo saves time and resources. If you want to simplify vendor onboarding and ensure smooth integration with your business, Odoo is the solution. Contact us today to learn how we can help set up vendor registration and elevate your business!

How Vendor Registration Works in Odoo Website Platform